Replacing the Content Search Webpart in Modern SharePoint


One big thing missing between Classic and Modern SharePoint is the ability to query and return content to be displayed in a customizable way. This can be important for sites where there are listings or where there is a lot of content that needs to be shown on a page. In the example I’ll use for this post, the client needed to show a list of experiences that required lots of custom fields to show together on a page and that those experiences could be filtered easily to find something that matched up with the user’s interests or background.
Modern SharePoint does have the Highlighted content web part, which does allow for complex queries to narrow down what shows, but there’s just the 4 options for how they are displayed. This will work for a lot of scenarios, but sometimes you just need to customize.
In comes PnP Modern Search!
I recommend their documentation for installation here: https://microsoft-search.github.io/pnp-modern-search/installation/ Once that is all set, we’re ready to get things started in your site. First, you’ll need to set up Managed Properties for all of the fields you want to utilize for either display or for filtering (PnP has documentation for this as well: https://microsoft-search.github.io/pnp-modern-search/scenarios/set-up-managed-properties/).
GETTING STARTED
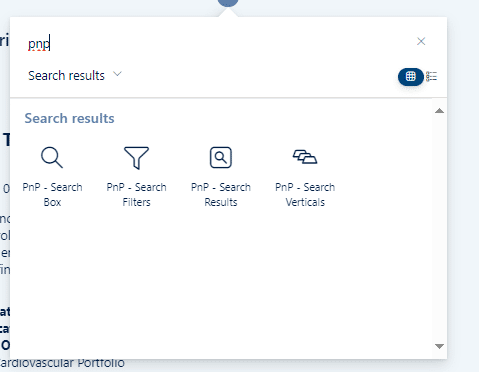
Once things are all set up, you can start building your listing/filtering page. Add the PnP Search Results Web Part and the PnP Filter Web Part to the page.
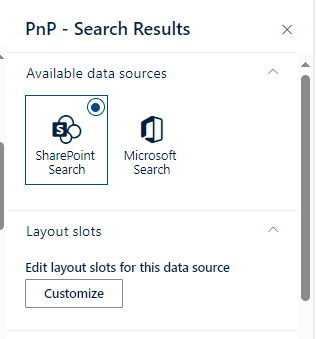
Next, start setting up the Search Results Webpart:
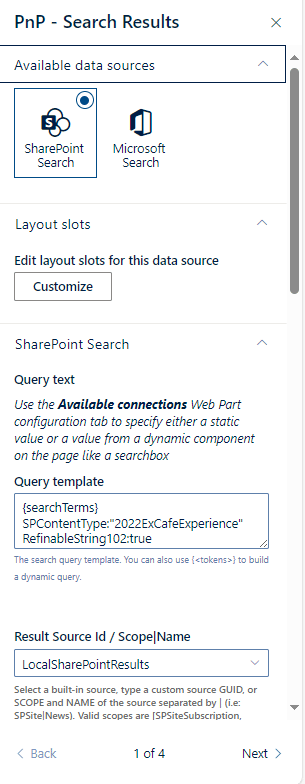
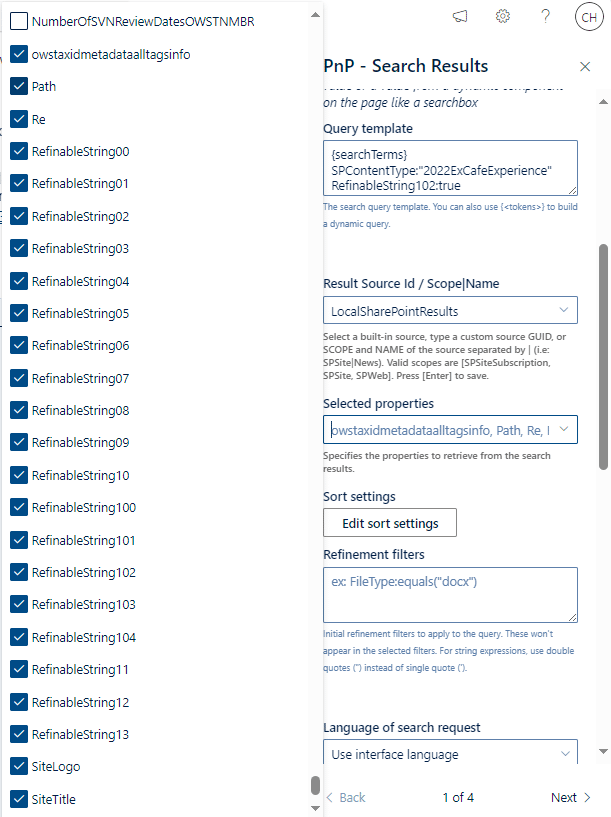
Here, we are pulling SharePoint Search results, using the query to limit to a specific content type and limiting further by a specific Managed Property (in this case it is a “Open” flag, so that only open experiences show on the page). You’ll then need to select all the rest of the managed properties in the “Selected properties” dropdown, I found it easiest to type in here to find the ones you need, but you can also scroll through the huge list.
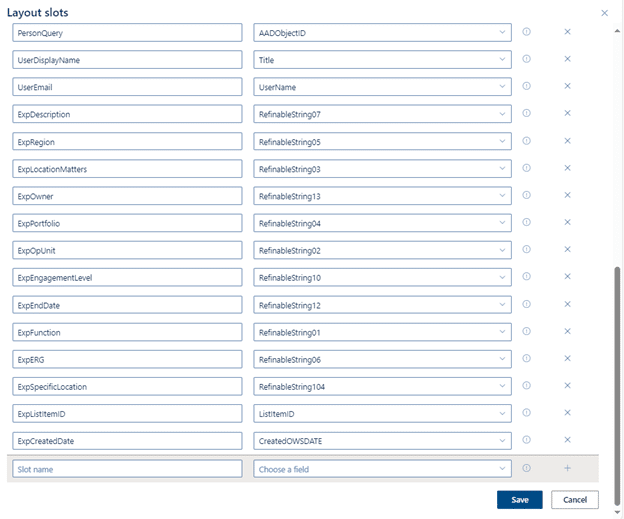
Once you’ve got all of the managed properties you need selected here, you can update your Layout slots to connect the selected properties to the naming you’ll utilize in your display template code.
The “Choose a field” dropdown will only show fields that you have selected in the Selected properties you did earlier. Then you’ll want to use a helpful naming convention for the “Slot name”, this will be how you pull things through to the display template using the slot name.
On the next page of the settings, you can pick “Custom” from the layout options.
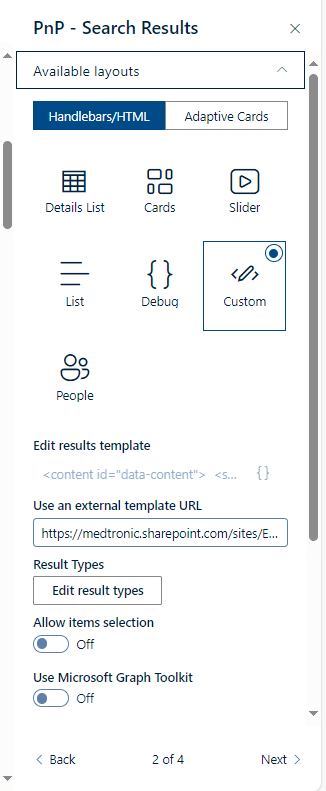
Here you will also point to your external template URL which is the display template file you’re utilizing for the custom template. In this case I stored my custom templates in a folder within the Site Assets library. PnP has info for starting your first template here: https://microsoft-search.github.io/pnp-modern-search/scenarios/create-your-first-custom-template/
Helpful tips for working with the custom templates
Pulling text fields in is nice and easy, just utilize the slot naming to pull the content through.

If you do pull dates through, you’ll need to pick formatting to have those be readable and nice.

If you only want to show content if there is a value in the field, you can utilize if statements using the managed property name to show or hide accordingly. In the example below, you’ll only see Portfolio is there is a portfolio chosen on the item being displayed.

When you’re done with the Search results webpart, it’s time to connect the filtering webpart!
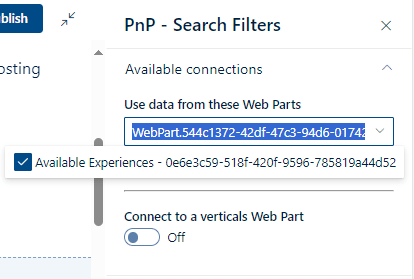
Connecting the filtering webpart
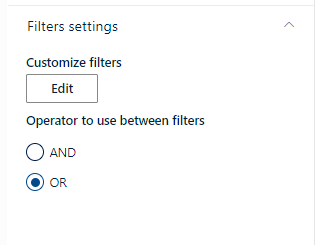
First, utilize the Available connections dropdown to choose your Search results webpart to connect to.
Next, choose you filters and if you’re doing “or” or “and”, in this case we are using “or” so that we get more results to show.
When you click on the “Edit” button you’ll see all existing filters that are set up, in the example I’m using there are lots of filters being used!
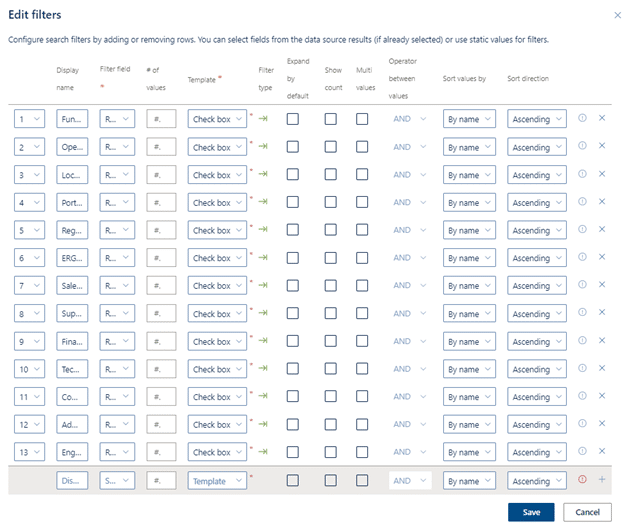
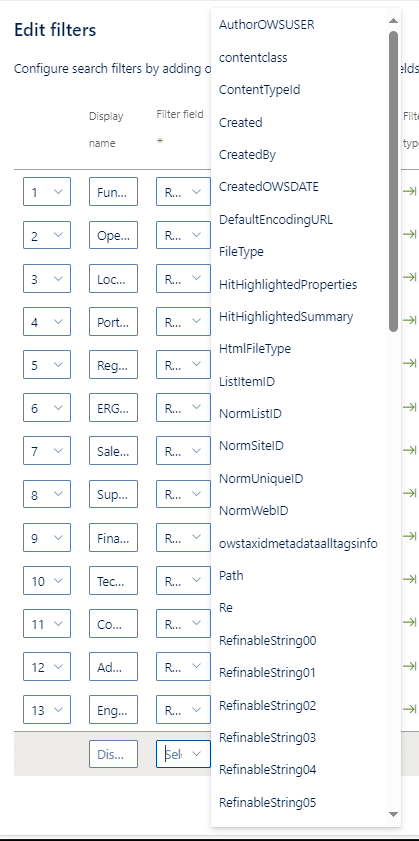
The “Filter Field” dropdown will show the selected properties that were chosen in the Search Results webpart.
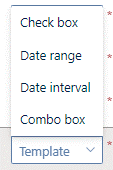
You can then choose how the filter shows up with 4 options. In the example, we utilized the check box.
You can also set the sorting option for the filters, either by name or by count and ascending or descending order.
Then save your changes.
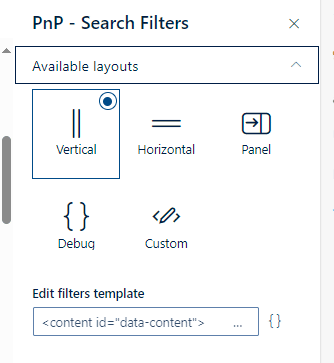
You can also pick layouts for the filters, but we didn’t do anything custom with these, just chose the vertical layout.
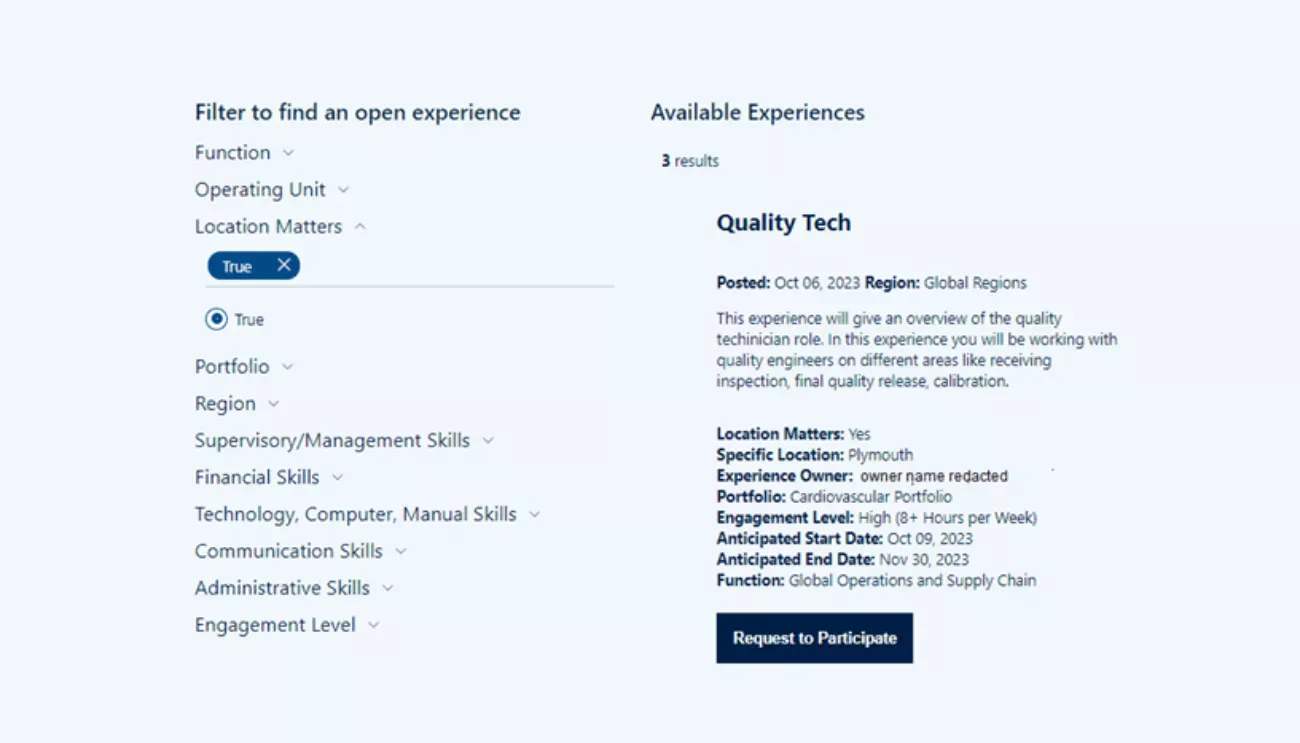
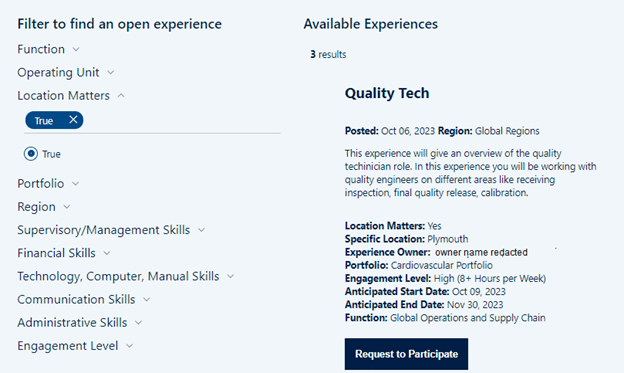
You now have a fully filterable listing!
Latest Blogs
MindLab Connect Is Live


Can a marketer replace a developer with AI coding tools?

Discussing Stupid Season 3: 1,000 Listeners and Counting