
Migrating From SendGrid to Resend: A Developer's Guide


At the end of July 2025, SendGrid suddenly announced that they would discontinue their Free Tier for sending emails. This kind of infrastructure change can cause issues for internal environments, automated notifications, and staging stacks that rely on lightweight email delivery. Although we used SendGrid’s free tier only for internal environments, we still needed a dependable alternative that would be simple to integrate without rewriting major pieces of our codebase.
After reviewing a number of options, we determined that the Resend free tier met our needs most effectively.
Why Make the Switch from SendGrid To Resend?
Resend provides a generous free tier that works well for development and internal systems, with 100 daily emails and 3000 monthly emails. It is also designed with developers in mind. Their documentation includes examples in multiple languages, and the setup process is intentionally straightforward. For teams that need to replace SendGrid quickly without committing to a paid platform, this makes Resend an easy choice.
Introducing Resend
Before you can send emails through Resend, you must create an account and configure a domain. Resend handles most of this through a guided setup in the Domains menu. If your primary domain already handles normal email traffic, you should use a separate subdomain for transactional email. This keeps your DNS records clean and reduces the risk of conflicting with your organization’s existing mail routing.

Step 1: Setting Up Your Account and Verifying Your Sending Domain
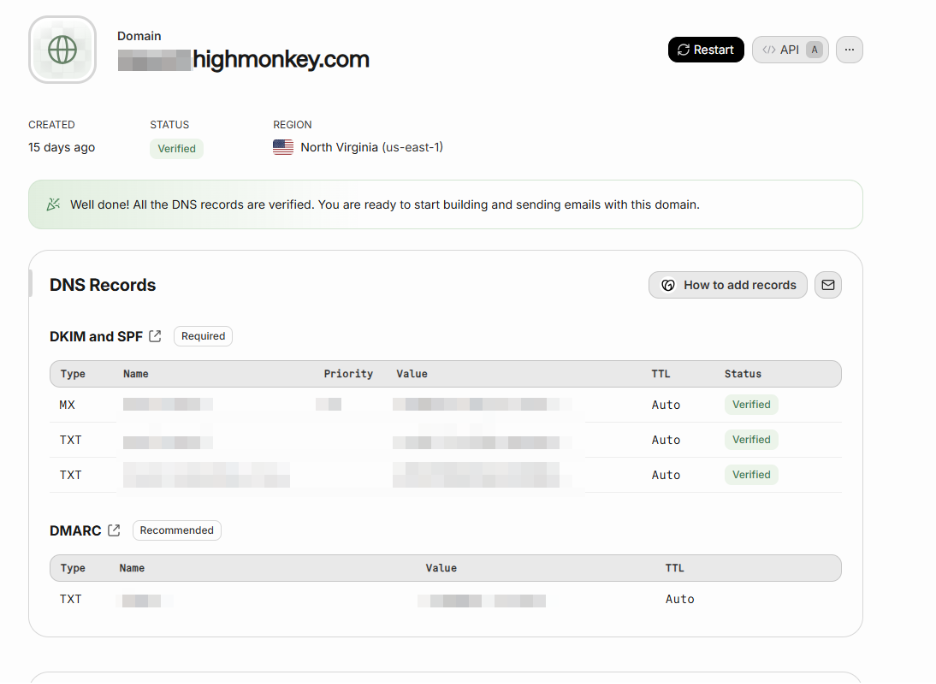
Here is what the domain configuration screen looks like. Resend provides DNS records that must be added to your DNS host such as Namecheap, GoDaddy, or Cloudflare. These records verify that you control the domain and that Resend is allowed to send mail on your behalf.
Pay close attention to the MX records. If you are adding a dedicated subdomain to Resend, the MX records they provide will not interfere with your primary domain’s mail handling. If you are working directly with the main domain, make sure you do not overwrite your existing base MX record unless you intend to change how the domain handles incoming mail.
Once your domain is set up, the next step is to generate an API key. You will find this under the “API Keys” section. Click “Create API Key” and provide a descriptive name so your team understands what the key is used for. Choose either Full access or Sending access based on your needs. If you do not plan to manage domains, keys, or accounts through the API, Sending access is sufficient.


Step 2: Replacing Your API Keys and Environment Variables
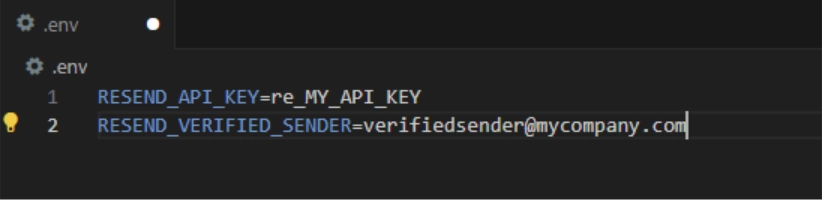
With your API key created, you can update your application. If you are using Node or Next.js, this is usually as simple as placing your API key and verified sender address into your environment variables or secure vault. The values Resend provides need to be placed wherever your application previously stored its SendGrid credentials.
Step 3: Refactoring Your Application's Codebase
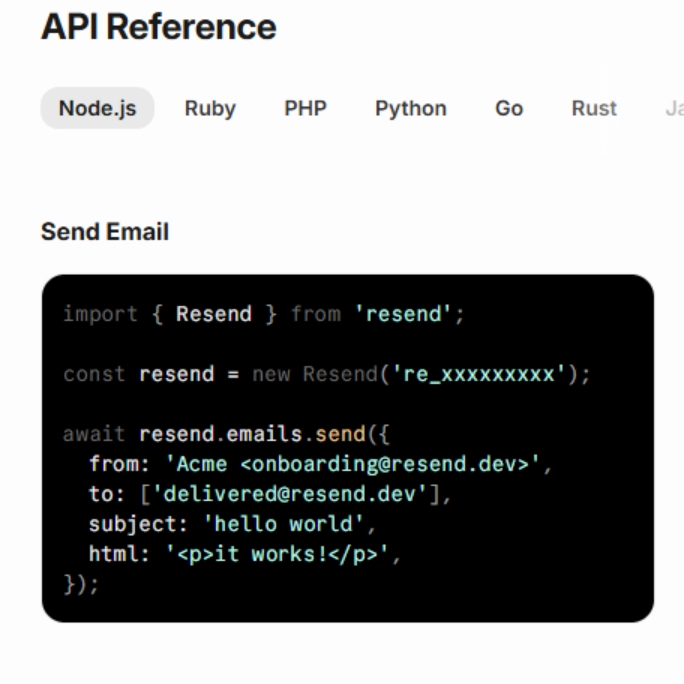
Resend offers code snippets that can replace your old SendGrid mail sending calls. You will find these examples inside the API Keys menu by selecting the “</> API” button. These snippets illustrate how to construct the request, what fields are required, and how to authenticate.
Make sure to include any necessary imports, confirm that your verified sender address matches the domain you configured, and rebuild your project so the environment picks up the new keys. If you run into issues, double check that your receiving email system is allowed to accept mail sent from your new subdomain.
Conclusion: Finalizing Your Migration
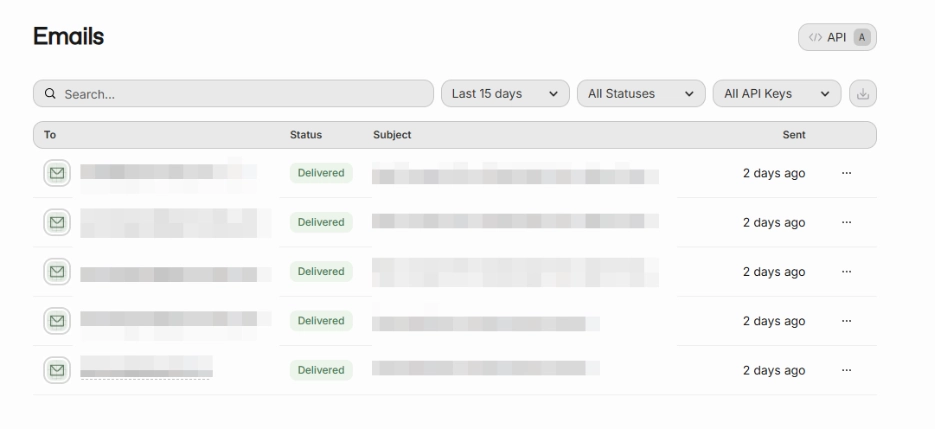
After your application is updated, send a few test emails and confirm that they appear inside the Emails menu within Resend. This screen shows delivery attempts, statuses, and basic message details. It does not control the entire delivery chain, so if an email does not appear in your inbox, make sure your endpoint mailbox or spam filters are not blocking it.
Once everything is verified, your migration is complete. Resend should now handle your development and internal email notifications without interruption and without the limitations introduced by the end of SendGrid’s free tier.
Latest Blogs
Inside the new OSA site

MindLab Connect Is Live

Can a marketer replace a developer with AI coding tools?